After spending a month in Chiang May, I was looking for a last solo hiking trip to do before leaving. My attention was drawn to Chiang Dao National Park when looking for something beautiful and not too far. There is a famous overnight trail which I had trouble finding useful informations about. So I rode my scooter 1h30 north to see by myself and took my drone with me.
Drone Diaries is a new concept I am trying. It consists in getting together my 2 favorite things: hiking and flying. Adventuring the outdoor accessible to me and experimenting with drone technics while providing useful tips and informations about amazing locations and hikes. The video combines stabilized shots from my Nikon alongside with drone footage and of course, as always, a dope beat! I tried color grading the D-Log footage form the drone for the first time in Premiere CC using Luminetri.
- Nikon D750 + Sigma 12-24mm 4.5-5.6
- DJI Mavic Pro
- Premiere Pro CC
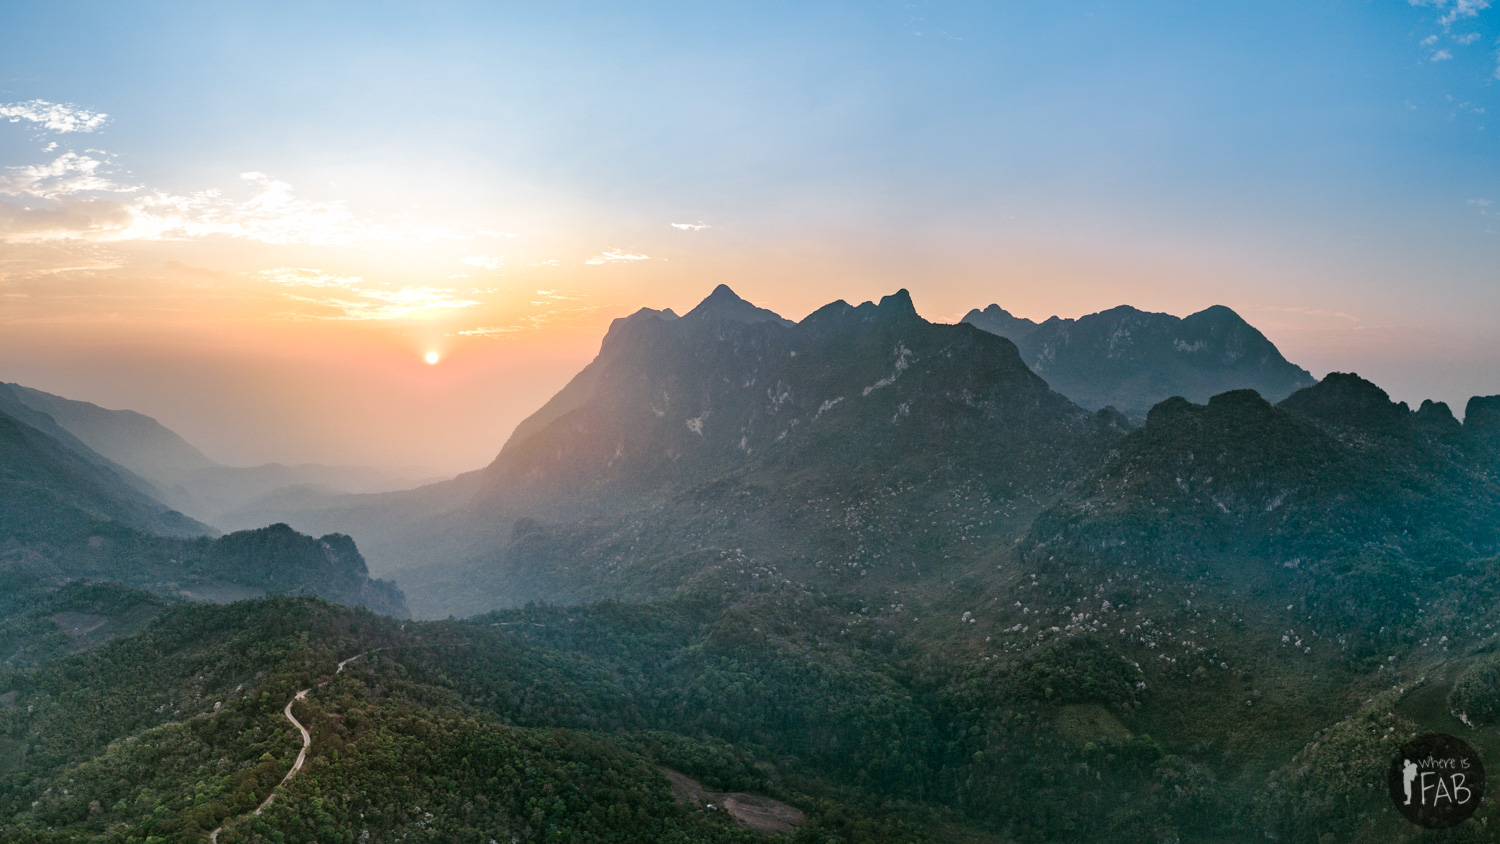
My initial intention was to do that overnight hike to watch the sunrise and wake up for the sunset but unfortunately I got lost and found the trail head too late. But I also read that you could do the hike in one day if you want to. So I decided to stay in one of the hostels before the park entrance and wake up early to start the hike. The park fee costs 200B but I went the next morning at 6AM and there was no-one and the gate was open so I just drove in. It is says that you need to hire a guide (for 1000B) and it’s nice to encourage local economy if you can but the path is pretty clear honestly. Half-hour passed the gate of a beautiful wavy road, you can see the entrance of the trail when you reach an open area. It says “No Entry”on the left side but this is exactly where you should walk in.
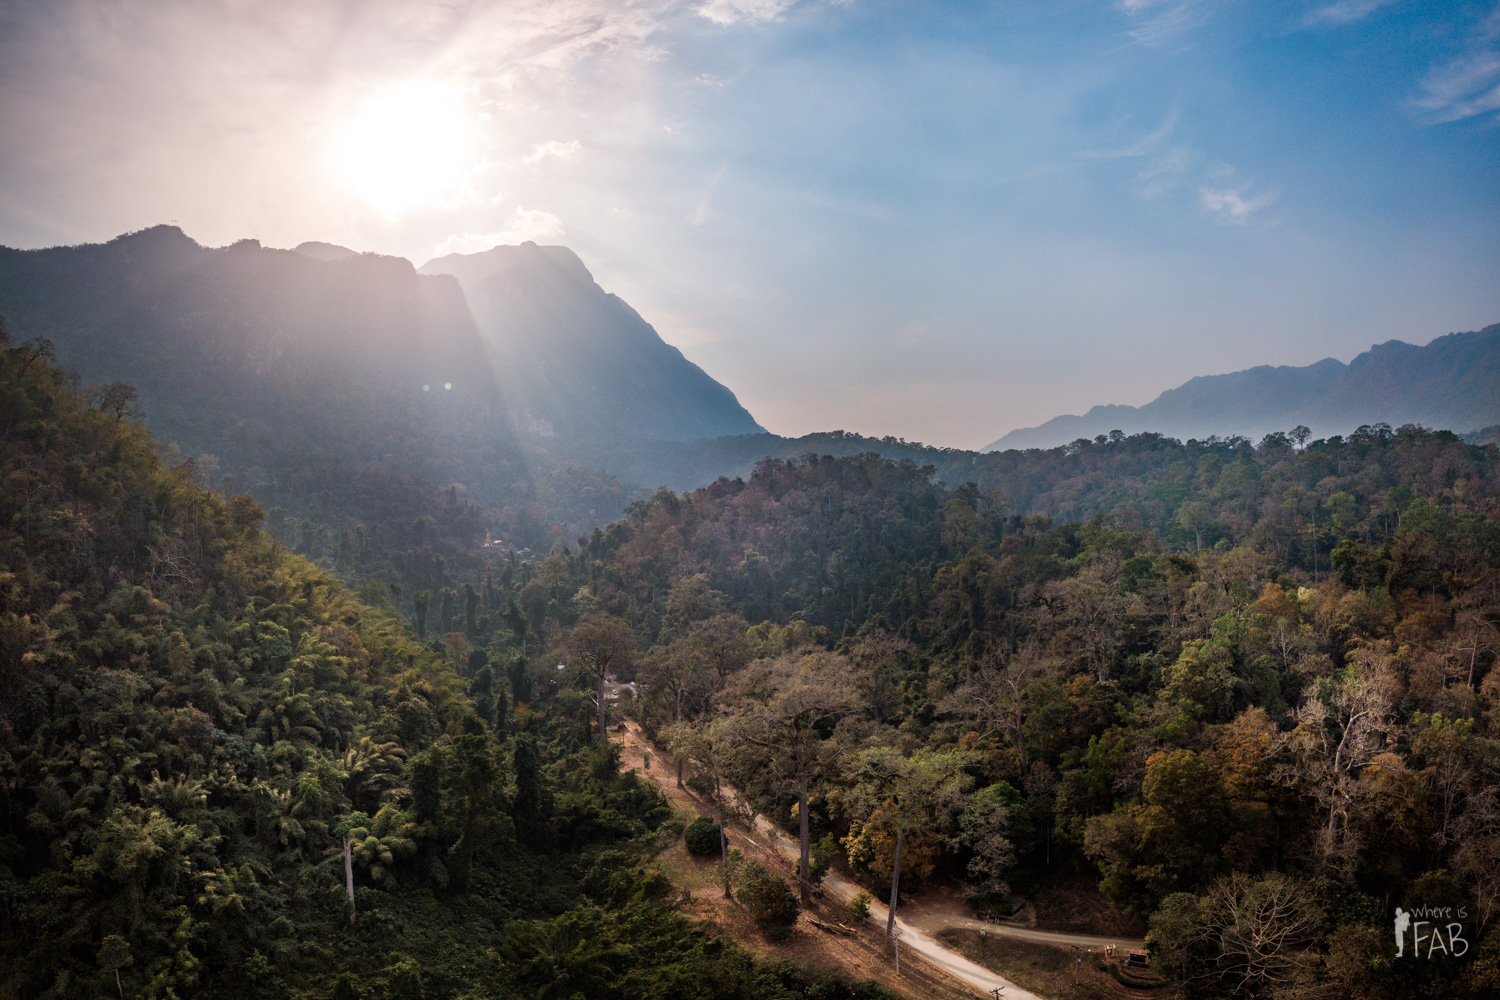
I first got lost by getting directions directly to the park on Google Maps. If you are looking for the trail head, make sure to continue on the 107 and than turn left on the 3024.
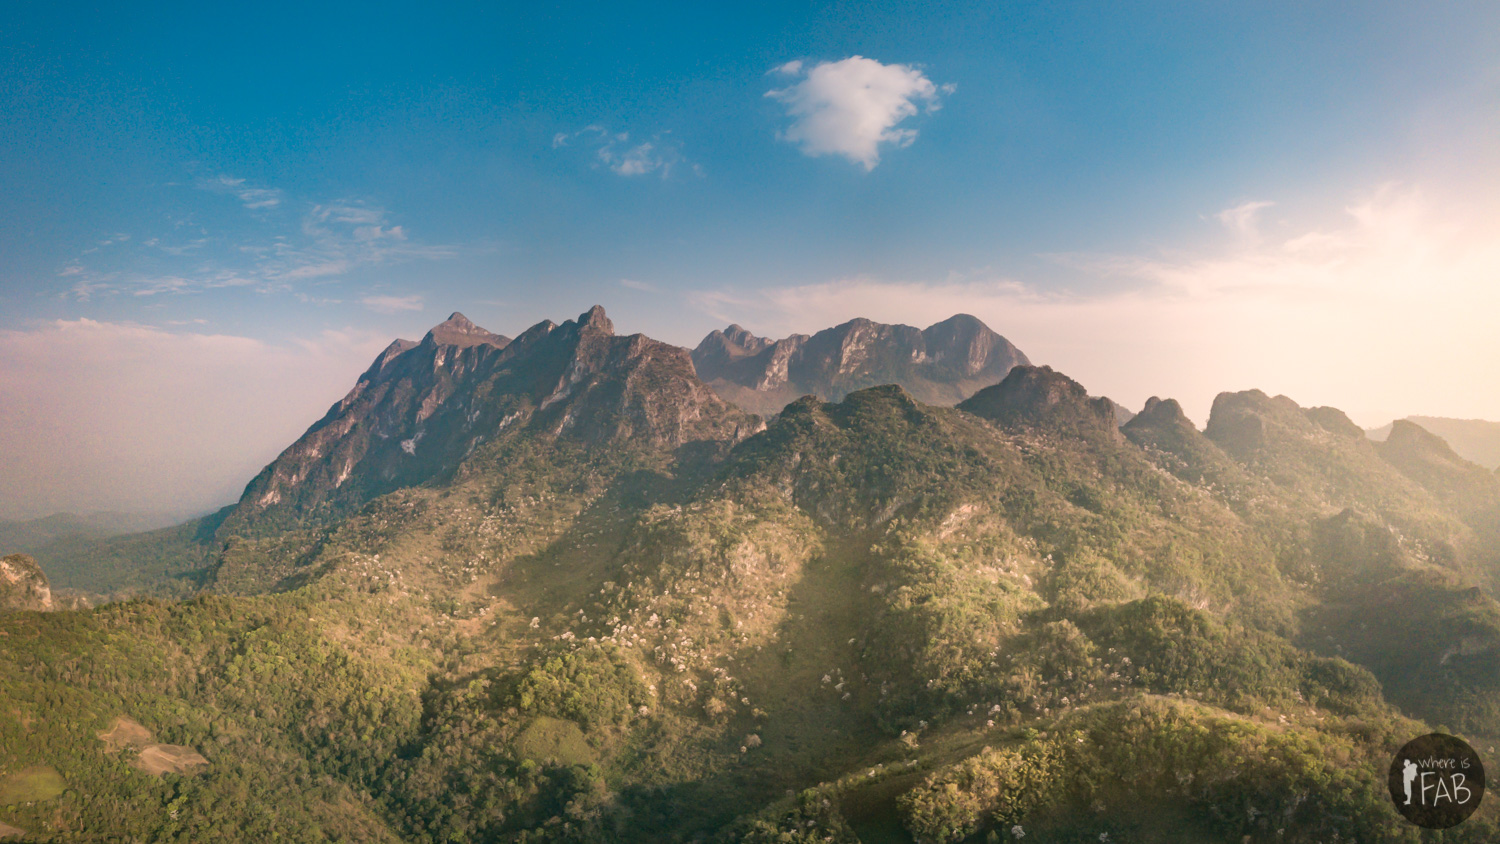
It took me 3h to reach the top walking at a good paste. It starts very covered but than it opens up. There was literally no-one that day I went, the mountains were all to myself! I didn’t even took water with me to be light, just carried my camera of course. There are a few intersections but make sure to go always left. It gets pretty steep when you start and finish but the view is really rewarding! The way back was faster and took me about 2h. There were a lot of white trees in blossom that part of the year but unfortunately the haze was pretty intense and blocked a lot of the view. If you are into photography like me, I would recommend to go for spring or summer. Nevertheless, this hike was fabulous and you can definitely do it in one day if you are in good shape.


You can rely on the DJI app to stitch your panos but if you want to push it further, you can do your stitching and editing with Lightroom or Photoshop which gives you far better results. The panos you see below are made using the 180° mode which takes 9 DNG pictures set to manual exposure (the spherical mode takes 21 pictures which increases considerably the amount of files and processing time ). I am using Lightroom CC to merge my 9 pictures into one large DNG file that conserves the full range of color informations so you can still edit your pano like a single RAW file.
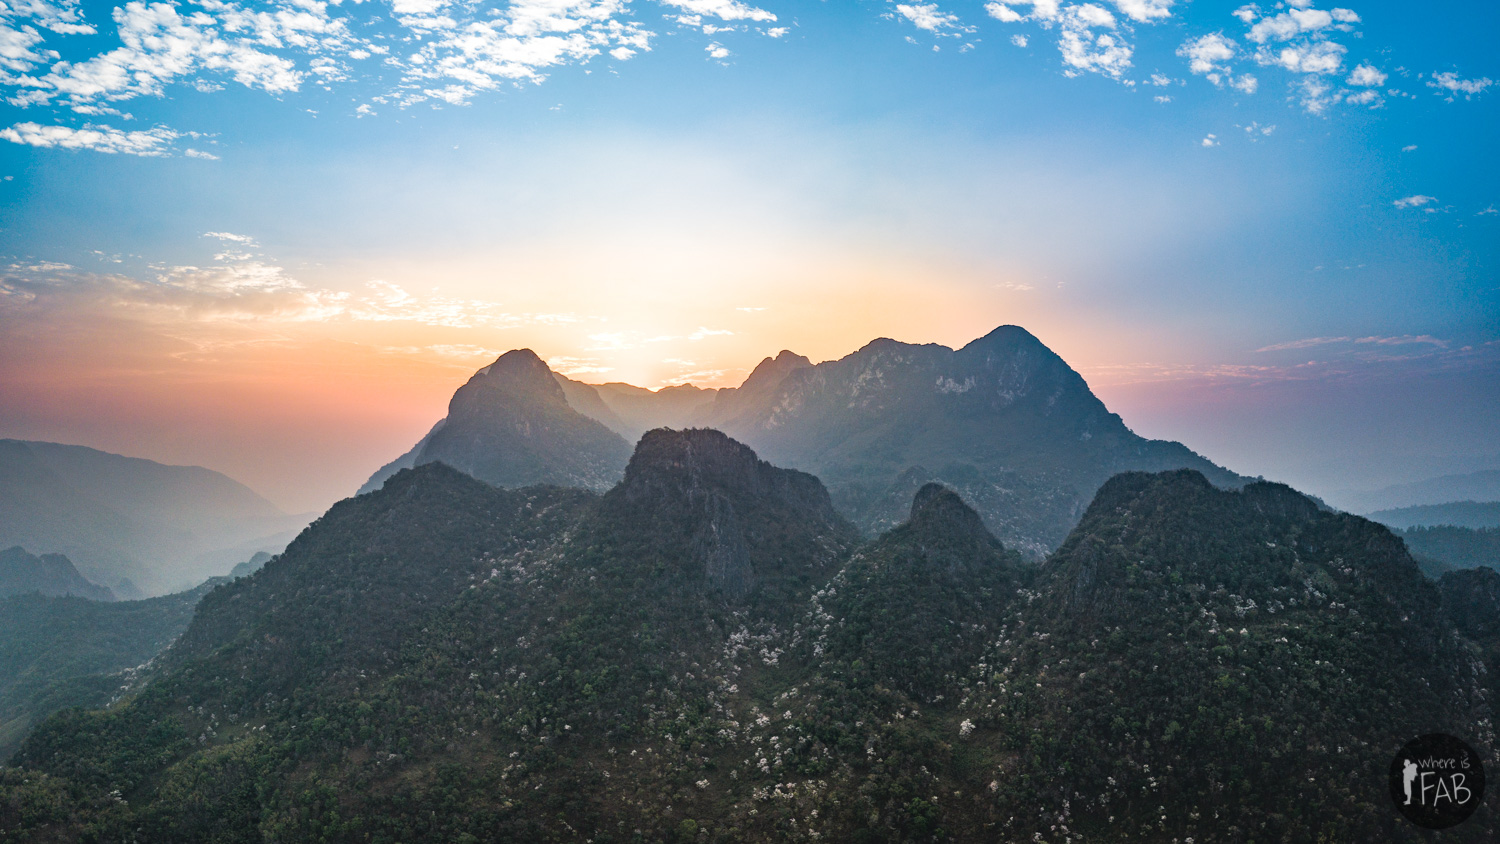
As a first try the results turned out pretty good! I was hoping for clouds and fog but all I could see was that blue haze that covers the horizon. It was hard to correct it in Lightroom especially during sunset or sunrise. I also noticed some grain in the details and next time I will try to compare the results with a pano created out of 5 or 6 bracketed portraits photos using the AED photo mode of the mavic (combine all individual pictures into single HDR images and than combine those images into a HDR panorama). I am sharing 2 videos that helped me with color grading my photos and videos: